
Sanding & Polishing For Jewelery Making
 A superior finish imparts a professional, high-value allure to your jewelry, setting it apart from the ordinary. But the question remains: how can you achieve such a result?
In this guide, we delve into the crucial steps of cleaning and preparing your jewelry for polishing. We share insights on the essential hand-polishing tools and demonstrate the use of power tools to attain a brilliant shine. Moreover, we unveil tips on taking your piece to the next level of luminosity.
Polishing stands as a pivotal aspect of jewelry making, capable of elevating your craftsmanship to new heights. The art of polishing is intricate, involving numerous facets and techniques. Traditionally, apprenticeships in polishing could span three to five years. While machinery can deliver excellent results, hand polishing, with the right tools and a dash of patience, can yield a superb finish.
Through the years, we've discovered that, like all aspects of jewelry making, polishing is a deeply personal endeavor with no universally superior method. Some find it therapeutic and gratifying, while others harbor a distinct dislike for it. Nevertheless, it remains a necessity. Recognizing this, we've gathered our expertise and your insights to provide a helping hand.
Below, we aim to unravel the various methods and tools at your disposal, allowing you to choose those that align with your preferences and project requirements. This comprehensive guide equips you with a foundational understanding, encouraging you to refine your skills through practice and personal experimentation.
Shop Supplies- Click Here
Preparation
 The significance of thorough preparation cannot be overstated in the realm of polishing. It is paramount to adhere to the first rule of polishing: invest time and effort in preparing your surface meticulously.
 The polishing process may bring forth deep marks, scratches, or fire stains, leading to frustration. Thus, getting this preparatory phase right is crucial. Taking an extra moment to refine your technique can prove to be a time-saving investment during the actual polishing stage.
Ensuring precision in solder joins and exercising heightened caution when setting stones are pivotal practices. These meticulous steps can minimize the necessity for extensive filing and sanding.
While a certain amount of these tasks may still be required, careful preparation significantly contributes to streamlining the overall polishing process.
Stage 1: Filing
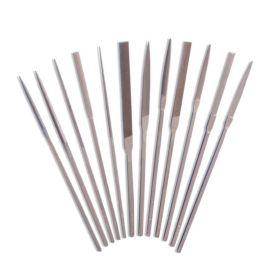
Filing constitutes a crucial step in the jewelry-making process. Needle files play a vital role in shaping and refining your pieces, eliminating excess metal and solder to enhance the precision of your design.
These diminutive files, known as needle files, prove especially adept at reaching small and intricate spaces. Available in various shapes, they are often conveniently sold in packs featuring a diverse set of shapes. This allows you to select the most suitable file for your specific requirements. As you gain experience, you'll develop an intuitive understanding of which file is best suited for each particular task.
Shop Files- Click Here
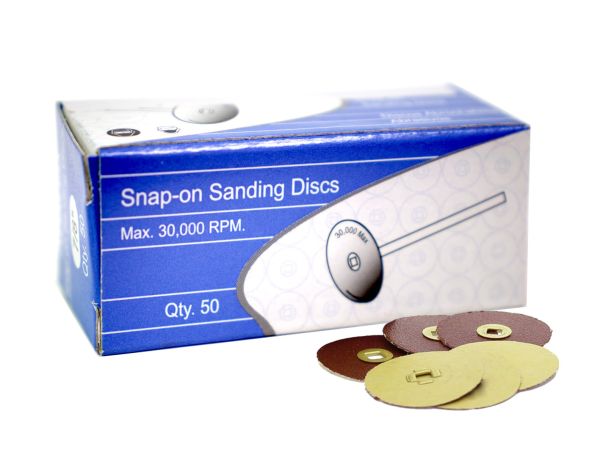
Step 2: SandingTo steer your jewelry towards a stellar finish, the crucial next step involves diligent sanding. The key to achieving an exceptionally high shine lies in the pre-polishing phase.
The more dedication and attention you invest in this stage, the more impressive the final results will be. Following the construction phase, your design undergoes various challenges, including fire scale, pickle residue, substantial scratches, and the notorious fire stain.
The following products are instrumental in addressing these issues, facilitating the removal of imperfections and significantly enhancing the efficiency and effectiveness of the subsequent polishing stage. Explore the selection of options provided below.
 |
 |
Shop Disk- Click Here |
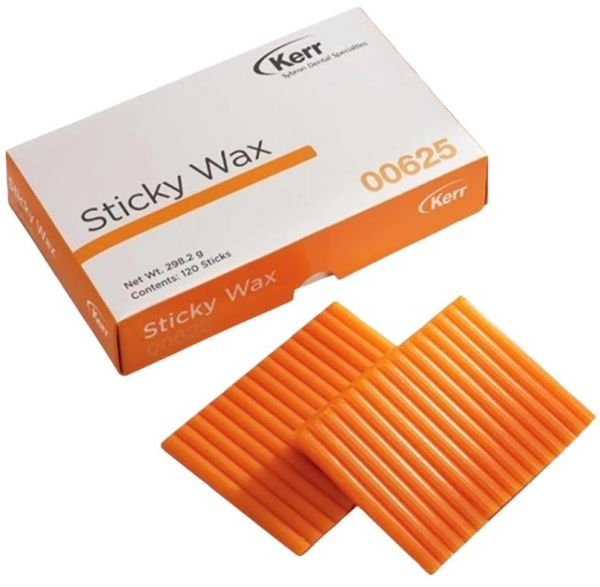
Shop Stick Wax- Click Here |
Achieving a finely polished, impeccable finish is attainable through either manual techniques or the use of a rotary tool, such as the Dremel Multi Tool.
Stage 3: Polishing
Employing a power tool can expedite the process and add a level of ease, yet opting for manual methods provides enhanced control, precision, and convenience. In many cases, a harmonious combination of both approaches yields the most optimal results!
 Hand Polishing With Polishing Papers
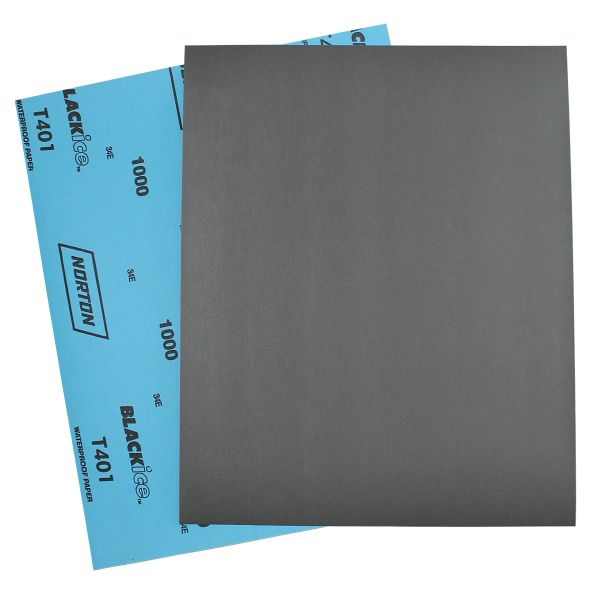
If you're a jewellery making beginner or you simply prefer working by hand, our polishing papers are a great choice to achieve a high sheen and getting into hard to reach places. These polishing papers are effective on metal clays as the pure silver is very receptive to gentle polishing methods but very good results can be achieved on harder metals such as sterling silver too.
After you have filed and sanded using the tools above, you can work your way through the colour grades of the polishing papers, starting with number 1 (the coarsest) and ending with number 6 (the finest), ensuring that you change the direction of your polishing action between grades for more even results. You will find the sanding marks will get smaller and then completely disappear.
As with sanding sheets, better results can be obtained when the paper is glued to (or even wrapped around) a small, flat piece of wood. The finish you can achieve with these is very good but if you are after a mirror finish you may wish to apply some rouge on a piece of leather, suede or similar - read more about this below.
Shop Papers- Click Here
 Stage 4: The Final Finish
Burnishing is technically characterized as the "plastic deformation of a surface due to sliding contact with another surface." Rooted in ancient practices, this technique involves rubbing hard materials like steel against softer metals such as silver and gold. The objective is to smooth rough metal particles, resulting in a shiny surface.
Typically equipped with a wooden handle and a steel blade, the burnisher is employed by rubbing it against the metal for polishing. The addition of oil or wax can enhance the smoothness of the action. While burnishing can be used to polish flat metal areas, achieving a genuine mirror shine may be challenging through this method. Softer metals like fine silver or those crafted from metal clay respond well to burnishing, and even agate stone can be used for this purpose. Burnishing excels in highlighting raised textures by rubbing over the elevated parts of a design, creating a captivating contrast with deeper, non-polished areas. This effect can be further intensified by applying a patina with liver of sulphur and subsequently burnishing the raised areas, accentuating the distinction between the bright, burnished sections and the dark, oxidized areas.
The burnisher proves to be an invaluable tool in the workshop. It excels in smoothing bezel settings over gemstones, providing a lasting, shiny finish to visible top edges. Additionally, it proves useful in eradicating scratches caused by setting slips, especially those challenging to remove without harming the stone. When used sideways along the scratch's direction, the burnisher can effectively smooth it out. A drop of oil aids in maintaining a steady smoothing action. With experience, you'll learn the optimal pressure required for effective burnishing.
There are two types of burnishers available: straight and curved. While both have their applications in the workshop, the curved style is recommended for its versatility.
Comments
Leave A Reply
Your email address will not be published.